Tuesday, April 21, 2009

Waldorf Fruit Salad


This is a good way to eat your fruits, but if you are like us, this salad will go fast. Everyone loves the taste of the red grapes as they burst in your mouth! Such flavor and sweetness! I add mandarin oranges versus regular Florida oranges because they are sweeter. I have tried adding regular oranges and I just don’t prefer it that way. However, you may wish to add regular orange slices as well. You can also replace the pecans with whatever you have on hand like walnuts. I prefer the pecans, though. You can also leave them out, but they add so much to this salad, they will be missed!

Ingredients

4-5 bananas
1 cup seedless red grapes (make sure they are seedless)
1-2 apples cut into cubes
1 15oz can mandarin oranges
1-2 celery stalks diced (optional)
¼ - ½ cup Mayonnaise (like Real Mayo – not miracle whip)
1-2 cups Cool Whip
½ cup of chopped pecans


Preparation

In a large bowl, peel and slice your bananas, add your chopped apples, grapes, and mandarin oranges, dice and add celery (optional), Mix together. Add your cool whip about 1 cup and ¼ - ½ cup of Mayo. You may need to add more, you will know by the taste. And finally add your pecans and mix well. I apologize, about the amount of mayo and cool whip, I usually buy a small container of cool whip and use about half of it, and add a little mayo to it (not a lot) til it tastes right. It doesn’t matter if you use light or fat free cool whip either. I use regular mayo because I read that the fat free is actually higher in calories than the regular. So anyway, I hope you enjoy this recipe.

Monday, April 20, 2009

Chicken and Dumplings


I learned this from an HGTV show. I’ll try to find the link and add it here
Cat Cora at Food Network

I’ve adjusted my recipe to feed a family of at least 5 and up. Not sure of the maximum because I usually have some leftovers. This recipe makes wonderful leftovers, too. Cat Cora uses onion and celery in her recipe. I do not cook with onion because my husband gets real bad indigestion. I usually don’t add vegetables, but it would be good also with corn, I think. You can adjust the recipe the way you like it.

1 4-5lb chicken (use 2-3 cups of chicken in this recipe)
1 cup milk (the rule is ½ cup milk for each cup of flour that you use)
2-1/2 - 3 cups flour
2-3 Tbsp Crisco shortening (the solid kind in the can) (the rule is 1 Tbsp for each cup of flour you use)
2-3 tsp salt (the rule is aprox. ¾ tsp for each cup of flour you use)
1-2 tsp (the rule is 1 tsp baking powder for each cup of flour used)
1 tsp ground black pepper
1-2 tsp garlic powder
2-3 bouillon cubes (or 2 cups chicken stock)

Cooking the meat

Cut your chicken at the joints (separate the legs, thighs, breasts, etc.) and place the pieces in a pot and cover with water. Add 1-2 tsp salt and 1 tsp pepper to the water. You can add 1-2 tsp garlic powder as well. Start by heating on a high setting until it starts to boil. Putting a lid on the pot helps it to boil quicker. Then turn heat down to medium-low setting or Medium setting. I like to add 2 chicken bouillon cubes to the water after it heats up, it will give the chicken more flavor and this is the water that we will use for our dumplings as well. We don’t throw anything away except the chicken bones! The meat needs to cook anywhere from 20-30 minutes. Check it for doneness by cutting it, and if there is no pink in the center it is done. I say 20-30 because you can put the chicken in frozen and it will cook well like this without defrosting it, just cook it longer. No need to defrost it. I usually defrost it a little if it is hard as a rock. Other than that, it won’t hurt to cook it without defrosting it.

Preparing the meat

After the meat is done, I let it cool off in the refrigerator for a little bit. Then remove and discard the bones. Cut the chicken up into bite size pieces. You will need about 2-3 cups of meat for this recipe. You can reserve some of your chicken for other recipes.

Preparing the chicken stock

You can drain the chicken stock if necessary. Just run it through a small strainer and place back in pot. Add your chopped chicken to the pot. Turn heat on simmer or medium setting.

Preparing the dumplings

In a large mixing bowl, add 2 to 2-1/2 cups of flour. Add 1-1/2 – 2 tsp salt. Add 2 tsp baking soda. Mix well. Add 2 Tbsp of shortening (the kind that is not liquid, but solid like butter) then blend or cut this in with a fork until it is distributed throughout the flour mixture. Add 1 cup of milk gradually to form a ball of dough. You can work and knead this with your hands. Using a rolling pin, roll the dough out til it’s about 1/8” thick or so. Take a knife and cut into 1” strips and then cut each strip so that you have small squares. Do this with the rest of the dough. You can drop these into the pot of chicken stock as you cut them. When the dumplings are done, they will float to the top. This only takes a second or two. Children can help with slicing the dough – because it can be done with a butter knife. They like to help with this part, and I’m sure you can use whatever help you can get!

Also, if you want to make adjustments to this recipe now is the time to do it. You can add herbs like basil, too. Adjust your seasoning, after all the pieces have risen to the top, you may start eating.

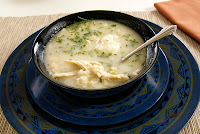
Notice how the milk in this recipe changes the stock to a smooth and creamy texture. I always make extra dumplings because the kids love them so much. My husband was surprised that this recipe did not need extra vegetables or anything. He thought he would still be hungry after eating it, but he was pleasantly surprised to find that it is very filling. I encourage you to make this especially when someone is ill. Chicken soup is supposed to be good for the flu and other things. I think you will find it quite satisfying and delicious.

Saturday, April 4, 2009

Quesadillas


This is the cheapest, most delicious, easy recipes that I know of. When in doubt, keep fresh flour tortillas, refried beans, and cheese on hand and you will have a hearty meal or a tasty snack.

INGREDIENTS

1 can refried beans
1 package flour tortillas
2 cups cheddar cheese (any cheese can be used – also in Latino refrigerated section, they make queso cheese especially for making quesadillas) I prefer to use the already shredded cheddar and monterey jack cheeses.
1-2 cups of cooked chopped chicken or cooked ground beef (Warm up meat in microwave prior to making the quesadillas)

Preparation

Spread refried beans on a tortilla. Top with chicken or beef and the cheese. Heat a small skillet to Medium-high or between Medium and Medium high. (You don’t want it to smoke, but be hot) . You can spray the pan with non-stick spray or just place a little olive oil and spread around inside the pan. Place the tortilla in the pan after you have topped it with the beans, cheese, and meat. Then place another plain tortilla on top of it and press with a spatula. The cheese needs to act like the glue to hold the two tortillas together. When the bottom tortilla has turned light brown, flip it over holding everything in place with the spatula. I think I have used 2 spatulas for this, one to hold everything together and the other to move underneath and flip it over with. Keep pressing down especially around the edges. Cook until the tortilla is light brown. Remove and slice into quarters with a pizza cutter. When serving these, they go well with sour cream or guacamole.

I hope you enjoy them.

Southern Potato Salad


My husband’s family taught me a quick way to make potato salad that I want to share with everyone. I used to wash my potatoes and slice them when I cooked them, but his family couldn’t believe that I went to so much effort. Also, if you like chunky potato salad better, then you will love this recipe. It has the same ingredients that I had always put in there, but this is my husband’s and my youngest daughter’s favorite recipe.

When you cook the potatoes, you don’t even wash them – that is if they came from the store and not your garden! Otherwise, you need to scrub the heck out of them first! Did you know that cooking them this way takes just as much time as cooking them sliced? I didn’t either, but it’s true. It only takes about 15-20 minutes. Slide a knife into them to check for doneness. Also, I usually cook them an additional 10 – 15 minutes, because I noticed that when they are really soft, the skins just peel right off, there will not be any potato clinging to the skins. You can do it either way, but I think the latter will yield more potato. The skins can be removed with a regular table knife – no need for a sharp knife here, but if you cook them an extra few minutes, you won’t even need the knife, they will peel right off with your fingers.

Also, just a note for boiling eggs. I once heard that to make the perfect hard-boiled egg, you boil the egg for 1 minute then remove from heat for 12 minutes. I boil my eggs for 2 minutes, because I find them a little undone the other way. Just don't forget to let them sit for 12 minutes.

Old Fashioned Southern Potato Salad

INGREDIENTS

5-6 Med-Large Potatoes
5 hard boiled eggs (the rule is 1 egg for each potato, that is what my in-laws go by – I usually just go under the number of potatoes and it comes out fine)
2-3 TBS dill relish (some people prefer sweet, but I encourage you to try it this way first)
1 TBS mustard (regular yellow – not grey poupon)
1-2 tsp Paprika
1 cup of mayonnaise (not miracle whip – Kraft Real Mayo)
Salt & pepper to taste

In a large stock pot, boil 5 –6 potatoes until tender. Read the paragraph above for cooking them. Peel potatoes and add chopped boiled eggs in a large bowl. Add mustard and mayonnaise and combine. Add the other ingredients and seasoning to taste. If the salad seems too dry, add more mayo. Sprinkle a little paprika on it before serving. Most prefer to eat this salad warm, so if you refrigerate it, it may be warmed up in the microwave. Also, it tastes wonderful with baked beans – try Bush’s they are excellent.

You may add chopped celery or onions to this recipe, but I never cook with onions because my husband is allergic to them. Either way, I hope you enjoy this recipe - especially with hamburgers or with an outdoor barbecue.

Perfect Grits


Who cares if you know how to make perfect grits anyway? Sometimes I feel like I can relate to that remark! But, I’m adding the recipe below for my daughters, and maybe someone else will appreciate it as well. Sometimes we take for granted that some of the easiest recipes could taste a whole lot better!

I have always known how to make grits because the recipe is right on the bag, but until watching Food Network on TV and trying different recipes have I learned how to make “perfect grits”. The only difference is adding a little milk instead of water. I’m a southern girl, so I grew up eating grits. Anyway, I was never taught to put milk in the recipe. And I had never eaten “cheese grits” – but they are delicious. I can’t remember if those were made with milk or broth, so I’m not putting that in my recipe. I think they would be delicious with milk. Anyway, cheese grits make a great side dish for a main entre` especially if your other side dishes are getting old and boring. Just cook the grits and melt cheddar cheese in them prior to serving. Everyone has their own way of eating grits. When I grew up, we were taught to mix our fried eggs up in the grits. If you have never eaten them this way, you ought to try it. However, there are others, like my husband, who don’t care for grits and only eat them with sugar on them – similar to rice pudding. One of my twin sons, does this as well. Well, I hope you enjoy this recipe.

This recipe below will serve about 4. If you only want to feed 1-2 people, then cut the recipe in half.

Perfect Grits

INGREDIENTS

2/3 cup - Quaker 5 minute grits
1 cup water
1 cup milk
1 tsp Kosher salt (I always eyeball this, I never measure it – just don’t put too much, you can always add more at the table – too much salt will ruin the recipe)


COOKING

Add the water and milk to a 4 quart saucepan. Add salt. Cook on Med - high until it starts to boil – you may want to put a lid on it so it boils faster. Stir every now & then so the milk doesn’t scorch. Once it boils, add the grits and turn heat down to Medium. Stir with a whisk to get all the lumps out. You can turn the heat down to Med-Low and let it finish cooking or wait the 5 minutes and then turn the heat down to low or the grits will scorch until ready to serve.